Get ready to indulge in the fun of making your own jewelry! Let’s discover the magic of polymer clay earrings, each one ready to add a special touch to your style.
Highlights
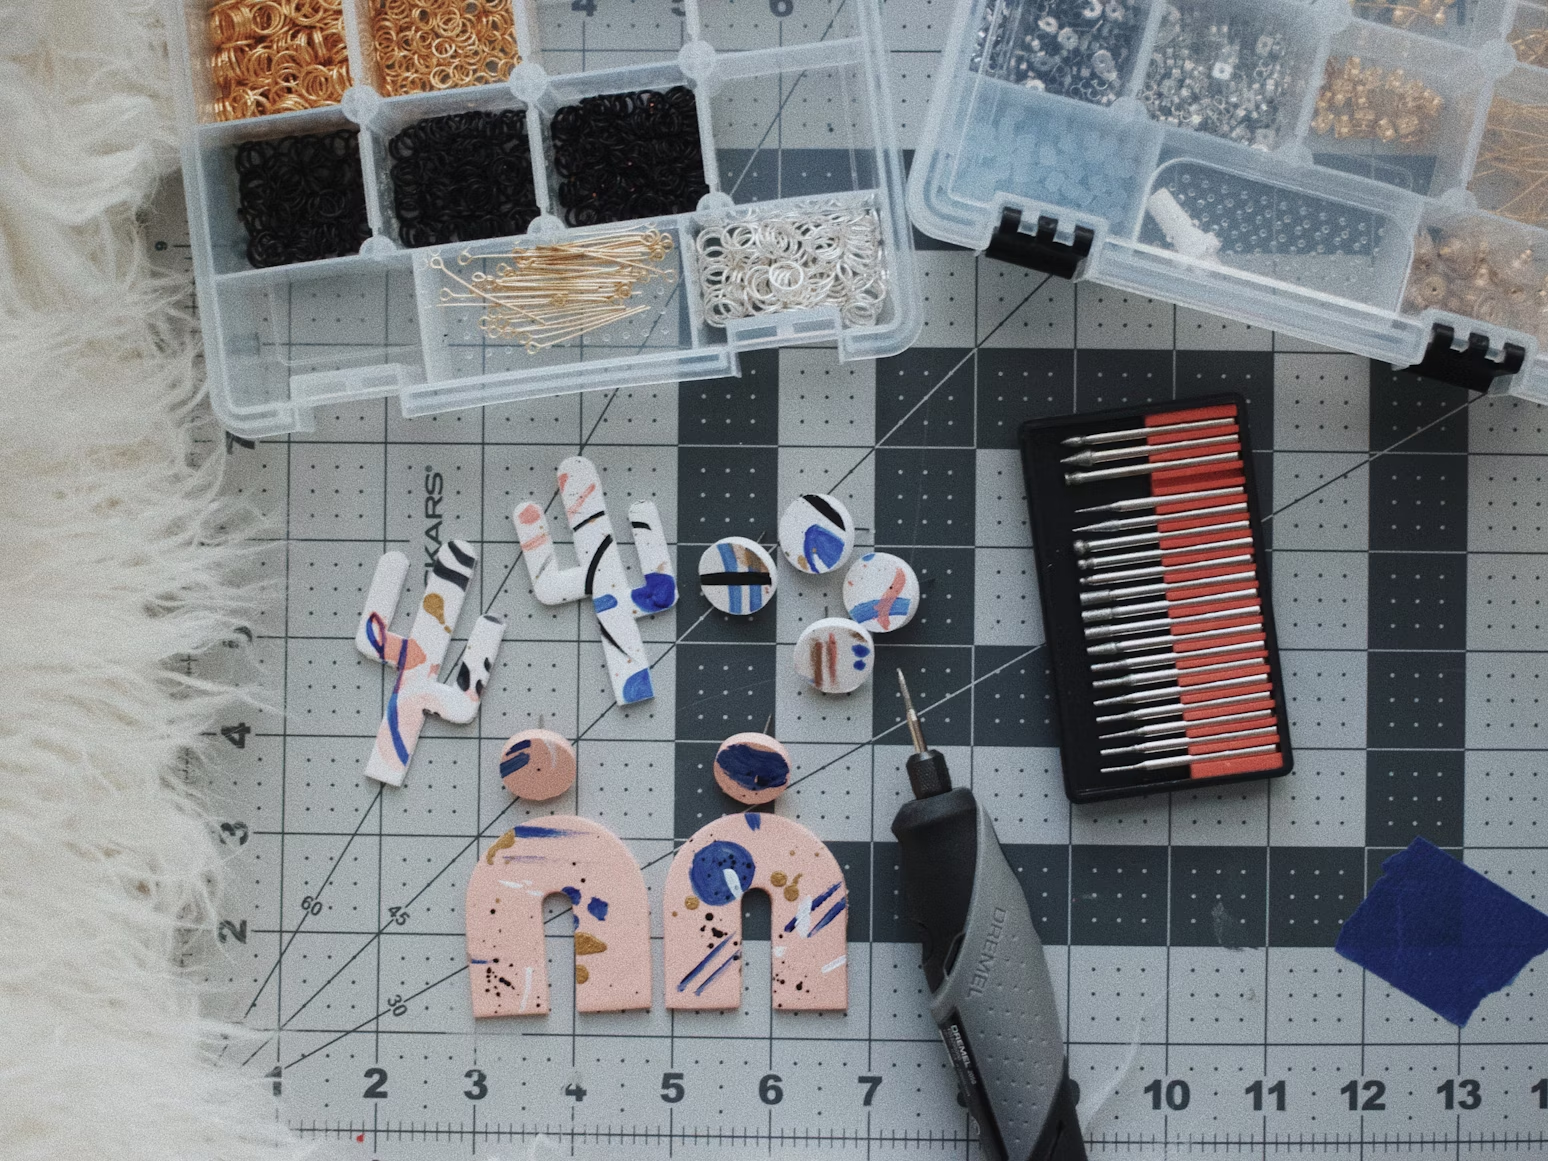
- Assemble polymer clay with various paints, coil hardware (hooks, posts), sandpaper, and clear varnish or glaze.
- Use E6000 or epoxy resin for secure attachment of coil hardware to polymer clay.
- Consider Fimo, Sculpey, or Kato Polyclay for color options and functions.
- Shape, bake But, polish and attach – Your journey to crafting stunning polymer clay earrings begins with these simple steps.
What Is Polymer Clay?
Let’s first discuss the definition of polymer clay. This is not the regular clay that dries in the air as art class clay does. It is a different kind of clay. Alternatively, you could shape and mold it, then bake it in the oven to solidify. I think it’s pretty cool.
Why Making Polymer Clay Earrings is Popular
Let’s first discuss the definition of polymer clay. This is not the regular clay that dries in the air as art class clay does. It is a different kind of clay. Alternatively, you could shape and mold it, then bake it in the oven to solidify. I think it’s pretty cool.
List of Essential Materials & Tools Needed
You’ll need to gather some supplies and equipment before you start. You don’t need anything fancy, so don’t worry. What you’ll need is as follows:
Materials:
- Colored polymeric clays
- Earrings hooks or Studs
- Glue
- Sandsheet paper
- Varnish or glaze
Tools:
- A rolling pin or something to roll the clay
- Cookie cutters or shapes knife
- Oven (To Bake the clay)
- Some other key stuffs include a working desk and a clean space to work
What Brand of Polymer Clay is Best
As for polymer clay, you have options like Fimo and Sculpey, so you can choose the one that suits your style or is easy to work with as both offer versatility.
Best Glue for Polymer Clay Earrings DIY
For best results, try using a stronger glue like E6000 or epoxy resin if your screws stick to the clay. This will secure your screws to prevent them from rolling back.
Setting Up a Clean and Organized Crafting Area
Having a tidy workspace is a good idea before you begin crafting. All you need is a table or desk; an elaborate studio is not necessary. Ample light and airflow must be available, your tools and equipment should be arranged so that everything is visible.
Basic Techniques of Polymer Clay
Now, on to the fun part – of course making earrings! Here are some basic tips to get you started.
Conditioning Polymer Clay:
Polymer clay can feel a little stiff when removed from the bag, so mix and roll until smooth and smooth. This process is called “conditioning” of the clay.
Rolling and Shaping Clay:
You can use a rolling pin or something similar to flatten your soil once it’s nice and smooth. After that, you can either cut out the shapes with a knife or a cookie cutter.
Cutting Shapes and Creating Designs:
Get creative with your photos! You can cut clay into shapes and glue them together to create all sorts of shapes and patterns.
Blending Colors:
Don’t be afraid to mix colors to create new colors and patterns. Just grind the colors until they are all nicely blended.
How to Make Polymer Clay Earrings: Step-by-Step Tutorial
Ready to make some earrings? Let’s go through that step by step:
Step 1: Prepare Your Workspace
Have everything you need laid out on your desk – your clay, your tools, and your coil parts.
Step 2: Choose Your Clay Colors
Choose the colors you want for the earrings. You can use just one color, or mix several for a marble effect.
Step 3: Condition the Clay
When the polymer clay is first removed from the bag, it can feel a bit stiff, so mix and roll until it becomes smooth and soft. This process is called “conditioning” of the soil.
Step 4: Roll Out the Clay
Till the dirt is about 1/8 inch thick, pound it with your rolling pin. Depending on the desired chunkiness of your chain, you can adjust its thickness.
Step 5: Cut Out Earring Shapes
Use your cookie cutter or knife to cut out shapes from the rolled clay. You can make circles, hearts, stars – whatever you want!
Step 6: Create Design Details
It’s time to use your creativity now! You can give your earrings more texture and design by using your tools. It’s entirely up to you whether you want to add swirls or stripes or make some tiny flowers.
Step 7: Make Holes for Earring Posts
In order to attach the earrings later, you must drill a hole in each stud when making them. Either a knife or a toothpick will work for this.
Step 8: Bake the clay
It’s time to bake your earrings in the oven once they have been shaped and embellished. To determine the ideal temperature and baking duration, refer to the directions provided on your ceramic bag.
Step 9: Finishing Touches
If your earrings are hardened after firing and cooling, they can be smoothed out with a little sanding before adding glaze and a glossy varnish finish for that extra shine.
Step 10: Attach Earring Posts
It’s finally time to screw in the socket posts. To attach each earring to the ear, just apply glue to the outside of the piece and allow it to dry.
Techniques like Texture and Pattern Creation
Get creative with various textures and patterns to make your earrings truly unique. Try pressing objects like string or leaves into the clay for cool designs, or use stamps and carving tools to add texture.
How To Drill Holes for Polymer Clay Earrings
If you use a hand drill, turn to a spiral clip instead of wire, gently make small holes in each coil, to avoid applying too much pressure and risk damaging it.
How To Bake Polymer Clay Earrings
Baking your earrings is easy – just follow the instructions in your ceramic bag. Make sure your oven is preheated to the perfect temperature, then pop your coils in at the recommended baking time.
How To Attach Earring Posts
Once your earrings are fired and cool, you can attach some glue to the earrings. Just make sure it’s centered and straight before the glue dries!
Polymer Clay Earrings Design Ideas
When it comes to making your earrings, you have endless options! Whether you want something elegant or simple is all up to you. You can create cute animal shapes or go for interesting abstract images. Improve your creativity!
Troubleshooting Common Issues
It’s totally ok to encounter common problems with earrings, so don’t worry! If your clay is hard and cracked, just add a little more to soften it. You can use a toothpick in addition to carefully poke and lubricate air bubbles trapped in the soil.
Tips for Maintaining and Storing Your Polymer Clay Earrings
To keep the polymer clay earrings intact, make sure to keep them in a dry, clean place, protected from direct sunlight and intense heat. Use a soft, damp cloth, wash thoroughly regularly, remove dirt or residue, and thus preserve their appeal for a long time.
Conclusion
Look at your beautiful handmade polymer clay earrings! Whether to decorate your own ears or as a gift for a dear friend, I hope you enjoyed the journey of creation and discovery. So, wear your earrings with pride, showcasing your unique style and craftsmanship!
Hey welcome to my blog . I am a modern women who love to share any tips on lifestyle, health, travel. Hope you join me in this journey!

Speak Your Mind