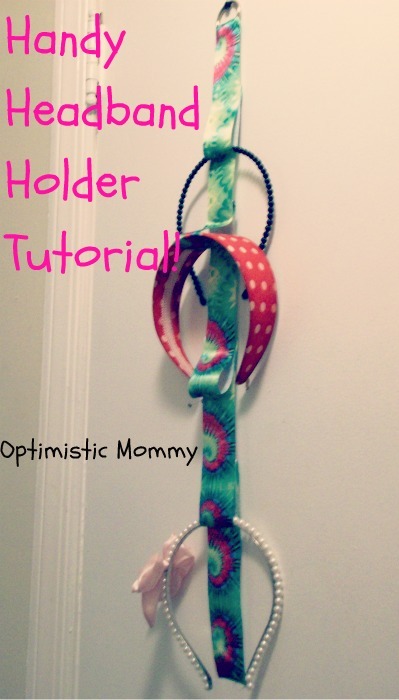
I’m super excited to be bringing you this great tutorial for a headband holder! I don’t know about you, but I have a problem with my headbands getting lost. Plus, my daughter will get a hold of them and, unfortunately, break them. 🙁 But I’ve found a way to keep them up and prevent them from being lost or broken! In comes the handy headband holder! I made one and I’m going to show you how to make your own!
Enjoy!
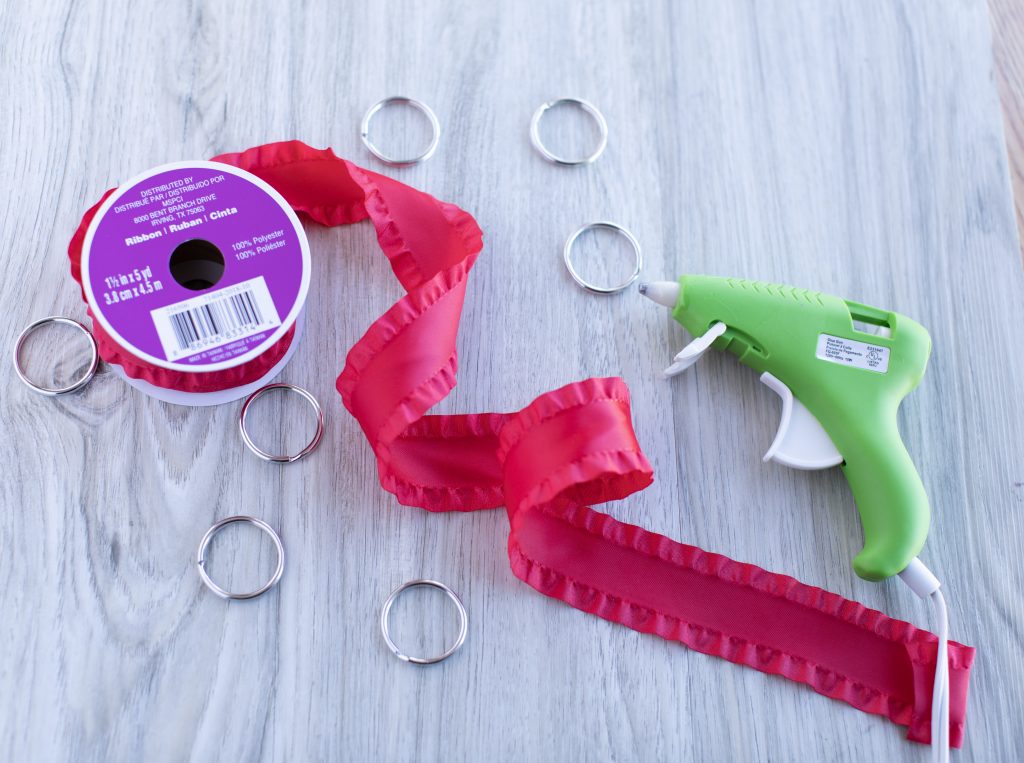
First you want to gather your supplies. Here is the list:
- Ribbon (I used about 3 1/2 feet of 1 1/2″ ribbon)
- Hook Ring (You can find these where the buttons are.)
- Hot Glue Gun & Glue (Also keep a glass of ice water handy in case you get any on your fingers!)
To begin, you are going to take your ribbon and wrap the end, about an inch or so, around the ring.
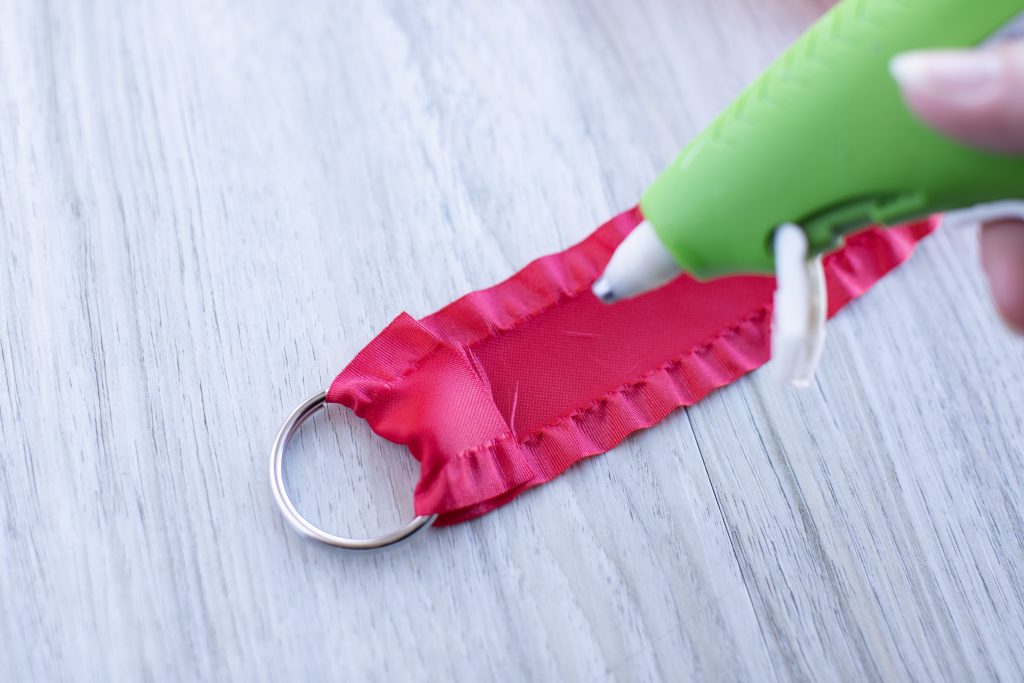
Next you will take about three inches of ribbon and pinch it so it creates a loop. Then you will hot glue it where it meets at the bottom.
You will then fold that loop down and glue underneath so it lays down.
You will continue like so until you have used all of the ribbon.
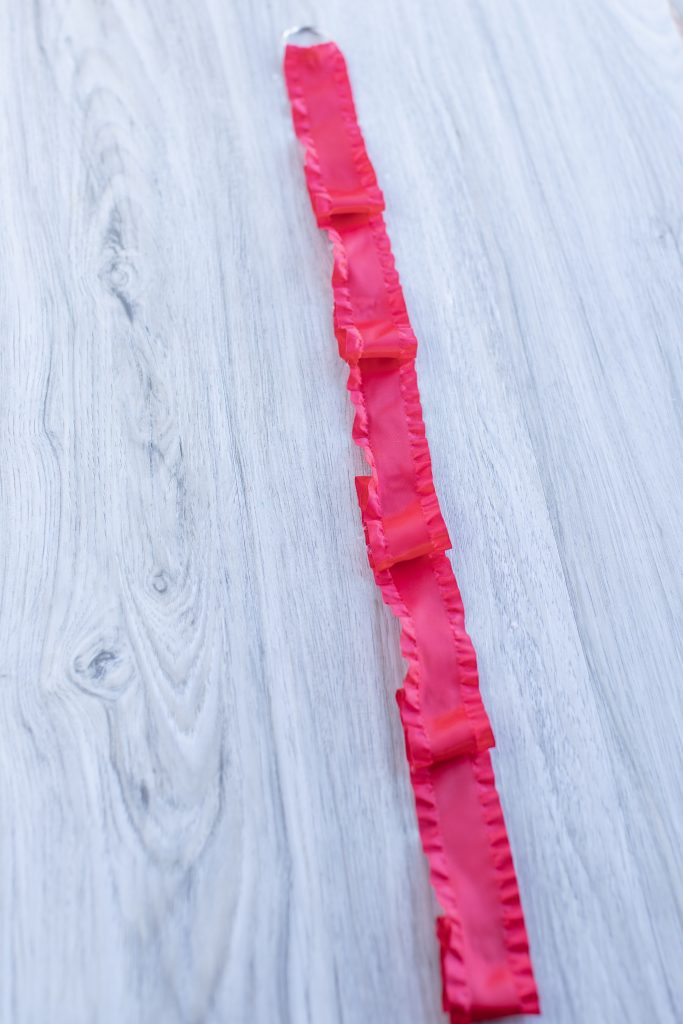
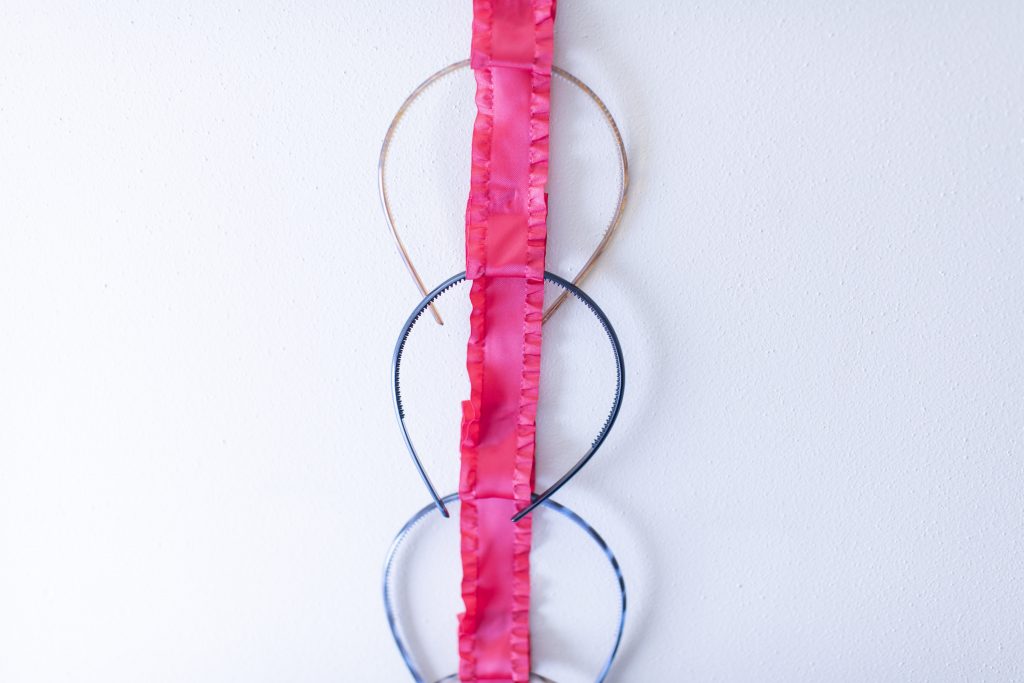
Now you can hang it up with a screw or you could even use a thumbtack if you really wanted to! Then you just load your headbands onto it! Your thicker headbands can only fit one per slot, but if you have skinny ones, you can fit 2 or 3 on each slot!
I hope you enjoyed this tutorial and you get to make your own! Please let me know what you think in the comments below! Thank you!
I’m a 20-something stay-at-home mother and wife. I have an amazing husband, a beautiful daughter, two loving dogs, and a lazy cat. I wouldn’t change my life for anything! I love to read, listen to music, cook and blog!

Wow I will have to show this to my daughter. Thank you
Thank you for stopping by!
Wow! I love a project that is simple yet Perfect! Thanks for the great idea!!
Thank you for the wonderful comment! 🙂
This is a super cute idea-and I bet lots of kids could handle the project, too! My daughter doesn’t wear headbands anymore, but I’m sure I can think of something she could use this for!
Thank you!
Boy do I need one of these! This is a project I could actually do. I love the colors of the ribbon. Thanks for sharing this. I’m going to tweet this one! =)
Thank you for sharing this! 🙂
Cute! I have this project bookmarked 🙂
Thank you for stopping by and bookmarking! 🙂
Really cute!! I shared on G+ … nice pics for step by step!! 🙂
Thank you so much for stopping by and sharing! 🙂
So easy, and SUPER cute! Sure beats hanging them all over the same back-door hook and hoping they stay!
Warmest regards,
Joy
https://www.PardonMyPoppet.com
Thanks! I had to find a way to keep them off the floor!
Great tutorial! need to make one for my dd!
Thanks! 🙂
It’s one of those projects that I look at and think…why didn’t I think of that!!! Such a simple and great solution…good job!
🙂 Thank you so much!
Well how cute and easy is that! Going to share this with all my friends with daughters, too.
Thank you so much! Thanks for sharing! 🙂
Oh my! What a wonderful idea! I have four daughters and there are headbands and hair accessories everywhere. lol We’re definitely going to make several of these. Now you need to come up with something for all the other hair accessories! Thank you. 🙂
I’m glad this will be useful for you! I’ll try and come up with something for other hair accessories! 🙂
such a cute idea and easy to make-great idea
Thank you for stopping by! 🙂
Oh my word. My oldest loves headbands and this would be just perfect for her! She’s crafty too so she can make her own. I’m going to show this to her! Thanks!
Wonderful! Glad you’ll find this useful! 🙂
Thank you for stopping by! 🙂
I just found a new project for summer with my daughter! Thanks so much for sharing this simple and great idea!
Thank you for stopping by! 🙂 Glad you find this useful!
That is so cute & it looks easy to make. My nieces have a lot of headbands,so they could really use one of these to keep them all together and easy to find. Thanks for sharing and have a great day!
It is very easy to make! 🙂
Thanks for stopping by! Have a great weekend!
Courtney,
I swear to you, I was just looking at Ava’s crazy collection of hair accessories THIS morning and wondering how to organize them better. I am SO making this. Now…an idea for hairclips? Hmmm…maybe the same thing minus the loops??
Wow, that’s crazy! I’m glad I could be of help! You could definitely do the same thing for hairclips, just don’t do the loops! Just don’t use as much ribbon (maybe use a half a yard or so – depends on how many clips they have).
Thanks for stopping by! Have a great weekend!
I have the same thing for the clips – I just thumbtacked each end of the ribbon to the wall and clip the clips on! Now if we could only think of something for the pony holders! Mine are right now on a dowel, and I have to take them all off to get the color I want. It’s not a very efficient system.
I totally need to share this with my sister!! Her daughter LOVES headbands!
Glad I could show something useful for your family!
Thanks for stopping by! Have a great weekend!
Ohh.. too cute! Love how simple it is to make!
It is very simple! 🙂
Thanks for stopping by! Have a great weekend!
Awesome Tutorial!!! Have pinned and tweeted.. will also f/b… Thanks, love ideas like this for gifts as well.
They would be great for gifts! 🙂 Thank you so much for sharing and stopping by! Have a great weekend!
This would be a great project to do with kids, maybe use some craft glue instead of hot glue just for safety sake though depending on the age of the child. Thanks for sharing!
Craft glue would work just as well!
Thanks for stopping by! Have a great weekend!
Nice tutorial and I love the ribbon you used!
Thanks for stopping by! Have a great weekend!
I’ll have to add this to my to-do list! What a great idea! Thanks for posting!
Thank you so much! I hope you have a great week!
Love this idea if I had a girl I would make one 🙂
Aww!
Great tutorial!! My daughters would’ve loved this when they were little!
Thanks! I hope you have a wonderful weekend, Mimi! 🙂
What a cool & practical tutorial! I should make one for my daughter, she has a bazillion headbands 🙂
That’s a really cool, nifty idea! 🙂 Pretty too! If I get into headbands this would be beautiful hanging in our bathroom. 🙂
You were featured in last week’s BYOB Link Party! Features will be posted Sunday! Come grab a button!
What a great idea! Thanks for sharing! 🙂
Aah! That’s awesome! We just got a bunch of headbands on clearance at Claire’s and I’ve been wondering how to store them! 🙂
Super cute project! Love this idea!
Have a wonderful weekend!
Hugs from Portugal,
Ana Love Craft
http://www.lovecraft2012.blogspot.com
My daughter has tons of headbands and this would be ideal for her. She’s eleven and can make this for herself. Must show it to her. So cool!
So fun! Thanks for sharing at Silver Pennies Sundays! x
Super fabulous idea! And so easy, too! Thanks for sharing!
Selene @ Restoration Beauty
Thanks for linking up to my party! I wanted to let you know I picked your link to feature this week! See my post and grab my feature button here https://handmadecuddles.com/2013/06/create-inspire-70-picks.html
Very cute! Thanks for sharing!
Please join us again Thursday at:
https://summersacres.blogspot.com/2013/06/the-homeacre-hop-23.html
~Ann
Thank you for linking up this great idea and tutorial to Say G�Day Saturday. This weekend�s party has just started so I hope you can join in again!
Best wishes for a great weekend,
Natasha in Oz