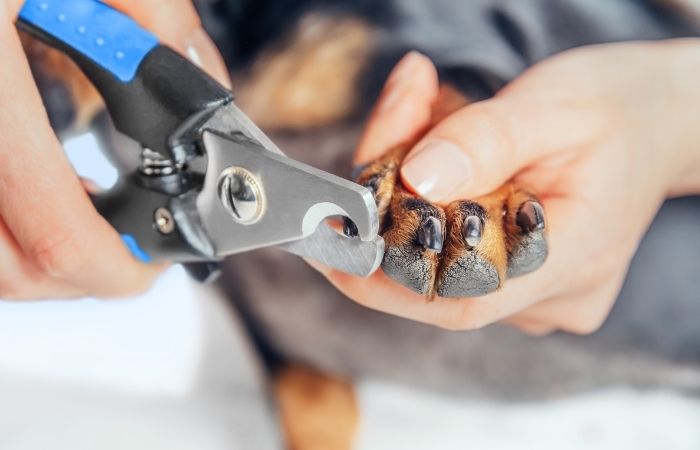
Your best friend deserves the best care you have to offer. And while brushing their coat and giving them a much-needed bath regularly can be a walk in the park, clipping their nails is a different story.
Most dog owners let the professionals do it, while others avoid it all together because it causes too much stress on their beloved pet. But did you know that caring for your dog’s nails is necessary to ensure they stay happy and healthy?
If you’re lucky, your dog will wear their nails out on their own. But that isn’t always the case.
When you don’t clip your dog’s nails as needed, they can grow into their skin and cause very painful ingrown nails. Long nails can also snag on clothes, upholstery, and carpets, create cuts, cause profuse bleeding, and even evolve into infections.
So, how do you make clipping time a happier time?
According to DogsCessories.com, there are seven ways to care for your dog’s nails properly, safely, and less stressful.
Let’s begin!
1. Create positive associations with touch
Starting from a young age or the moment you take your dog home, make a habit of touching their paws and toes even when you don’t plan on cutting their nails.
Doing so will desensitize them from the sensation and will help them associate your touch with more positive interactions.
To make sure they create positive associations, give them treats as you do it.
2. Only use nail clippers made for dogs
Since dog nails aren’t flat like human nails, nail clippers for humans can cause uncomfortable sensations even when they’re sharp. Scissors are also out of the question because they could lead to potential injuries since it’s hard to control them.
3. Make sure you and your dog are in a comfortable position
Smaller dogs can sit comfortably on your lap and relax better. But bigger dogs will need more stability. In this case, sitting on the floor is a better option.
Others have had a lot of luck with pet grooming hammocks. They are made out of sturdy cloth and come with hooks and leg holes. This is meant to keep your dog suspended in midair and help them relax while freeing their paws for an easier, more comfortable nail trim.
4. Keep your dog relaxed
Help your dog relax during the whole process by reassuring them in a soft, composed voice. When you do this, your dog will feel more at ease and not hold it against you afterward.
5. Spread out each paw and keep them stable as you clip
Dogs’ nails are usually dark, making it difficult to see where the “quick” (the tip of their nailbeds filled with blood vessels) begins.
To make sure you don’t cut into the quick and cause profuse bleeding, take a flashlight and shine it below your dog’s nails. This should help you have a rough idea of where the quick is and avoid it completely.
What happens when you accidentally nick their quick?
Start applying pressure with a clean cloth to the injury for at least five minutes to stop the bleeding. To help speed up blood clotting, a small dab of nail styptic powder on the cut does the trick. If you don’t have styptic powder round, you can use clean flour instead.
Once the bleeding stops, wash your dog’s paw with warm, soapy water and inspect the injury. If it’s a small tear, you can go ahead and clip away the damaged part.
However, a trip to the vet is a must if the entire nail is already dangling from the toe. Do not attempt to remove this yourself, as this is very painful and traumatic for your dog.
6. Don’t forget your dog’s dewclaws
Dewclaws are the canine equivalent to human thumbs. They help your dog gain extra traction and wrist joint stability when they’re running at high speeds on slippery surfaces.
They also help your dog hold objects better as they chew on them, climb trees, or climb out of any icy water.
For some dog breeds, dewclaws are attached to their body with skin. In this case, they serve no purpose and are removed shortly after birth. Dogs who have dewclaws attached by bone, ligaments, and joints are simply left alone and do their job.
Trimming dewclaws are a necessity since they are easily torn and can cause immense pain. Look for them on the inside of each foot where the thumb is supposed to be and follow step #5.
7. Make sure you give them a reward for their cooperation
Once you’re done, don’t forget to give your dog a lot of encouragement, praise, and
Hey welcome to my blog . I am a modern women who love to share any tips on lifestyle, health, travel. Hope you join me in this journey!

Speak Your Mind