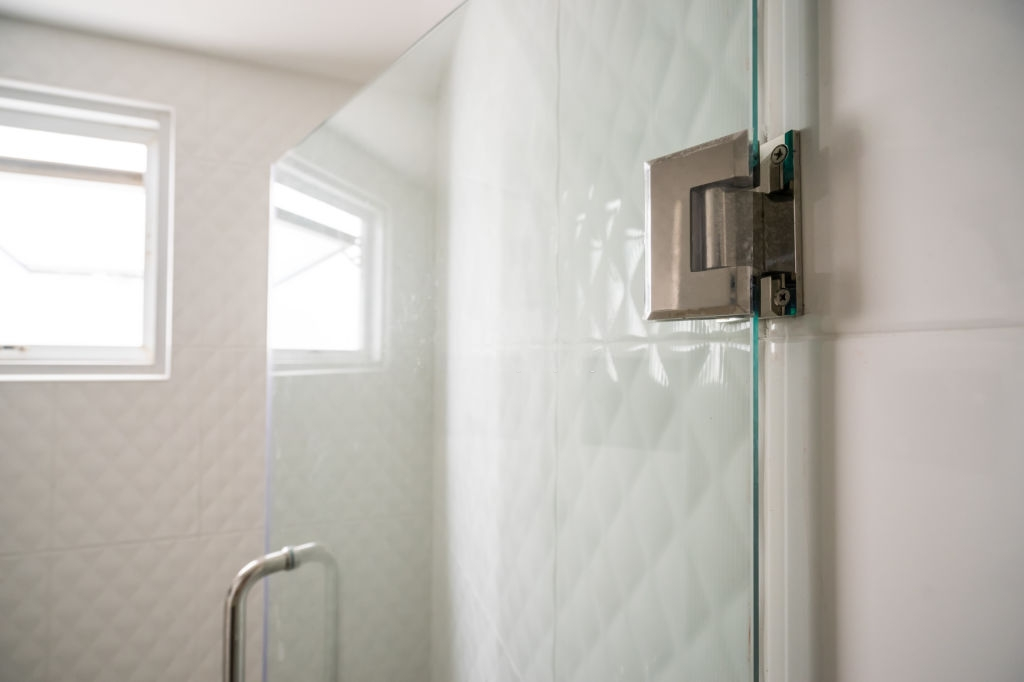
Hinged shower doors swing out into the bathroom to open and to gain entry into the dedicated shower area or shower enclosure. The hinged shower door does not have bottom tracks. As a result, it is effortless to keep clean and maintain.
Also, the door is an excellent option for creating a wide opening for your dedicated shower area or enclosure. This makes it an excellent fit for people who have challenges with mobility. The opening can also be made more prominent by making use of additional side glass panels. Must checkout small bathroom shower door tips and ideas for extra space in the bathroom if you have a small one.
Another great feature of hinged doors is that they blend into the bathroom walls and environment seamlessly. This is made possible because the use of brackets and tracks are at a minimum. The seamless blending creates the effect of a single bathroom unit.
TIP: Looking to replace a storm door? Make sure to check this for reviews of the best ones.
There may come a time when you need to replace your hinged shower door, or it could be an upgrade. Whether it’s due to sagging, rusting, or bent hinges, replacing your shower door is a great chance if you’re looking for an easy bathroom update. This guide will walk you through the simple steps to replace your door with minimal hassle, helping to refresh your bathroom with minimal effort. It may be as a result of the hinges of your door sagging, rusting, or bent with years of use. This piece will take you through the steps that will make replacing your door an easy and straightforward process.
TOOLS AND MATERIALS NEEDED FOR THE DIY PROCESS

To change your hinged shower doors, you will need the following tools and materials.
- Putty knife
- Screwdriver
- Utility knife
- Razorblade
- Denatured rubbing alcohol
- Heat gun
- Hinge mount
- Hinge
- Mildew cleaner
- Mounting strips
- Screws
- Adhesive caulk
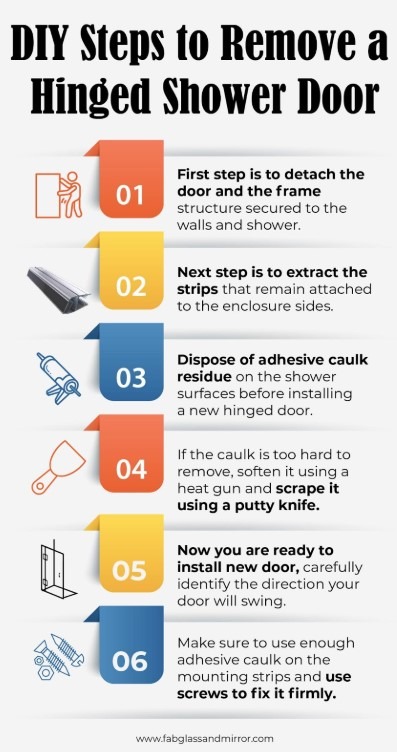
DIY STEPS TO REMOVE A HINGED SHOWER DOOR
- STEP ONE
The first step is to take out the old frame. This comprises detaching the door and the frame structure secured to the walls and shower threshold. Dismantle the parts carefully to prevent damage from happening beginning with the door hinges.
Take your time to remove individual hinges separately if the door has many different hinges. Some hinged shower doors possess single long hinges.
Take out the screws and individual hinges until the door detaches, and you can put it down. Proceed to extract any parts that are still stuck in the threshold of the shower enclosure and side supports.
- STEP TWO

The next step is to extract the strips that remain attached to the enclosure. After taking down the screws, hinges, and door hardware, you will notice a strip on the enclosure’s sides. Observe the strips carefully to see if they contain screws. If there are screws, extract the screws first.
Also, avoid pulling off the strips from the wall directly to prevent damaging the surface of the enclosure. Use a one-inch sized putty knife to break the adhesive securing the strips to the wall. To do this, slip the putty knife gently under the strips and move the knife down gradually.
For the strip on the other side, repeat the process to extract the strip. If the strips are attached to tiles, you may need to pull off the tiles or loosen them.
- STEP THREE

The next thing to do is to clean the shower surfaces. Once the strips have been extracted successfully, you will have residues of adhesive caulk on the shower surfaces. Before installing a new hinged door, the residue has to be cleaned off. You can decide to do this in different ways, depending on what you are comfortable with.
You may use a razor blade angled low in a holder to get rid of the residue, or you can make use of the utility knife. The utility knife especially will get into pockets and corners. These will help you get rid of the caulk buildup.
If the caulk is too hard and difficult to remove, soften it by using a heat gun set at a low temperature. Once there are no visible signs of the caulk, clean the surface extensively using denatured rubbing alcohol. clean it off using a mildew cleaner or follow a reliable method to remove shower mould effectively, since alcohol alone won’t do the job.
Once the surface is free of caulk, grease, and soap scum, dry the surface completely. Now it’s time to install a new hinged door.
- STEP FOUR

After extensive cleaning with a surface free from any form of residue, it is time to install a new hinged shower door. For every door purchased, there will be an instruction manual on how to install your shower door successfully.
Follow the installation instructions carefully to avoid problems. Also, make sure to observe the direction of the hinges before installation. This helps you identify the direction your door will swing into after installation. It is common to fall into the error of not identifying where the hinge will face before installing, and this will leave your shower door swinging in the wrong direction.
Furthermore, make sure to make use of enough adhesive caulk, especially on the mounting strips. Sometimes, the installation instruction may mention screws and not caulks, still make use of caulk. Use a long adhesive caulk across the bottom threshold and mounting strips that are about one-quarter inch wide.
I’m a 20-something stay-at-home mother and wife. I have an amazing husband, a beautiful daughter, two loving dogs, and a lazy cat. I wouldn’t change my life for anything! I love to read, listen to music, cook and blog!

Thanks for giving us complete guide! your ides of on removing hinged shower door are amazing and helped me a lot>
Very Useful guide on removing hinged shower door. Thanks for your good share. Keep it up!